Friday 21 June 2013

Mac hard drive Imaging to prevent data loss situations


Today, there are many ways to backup your data in order to protect it against loss. In this article, I will discuss about Imaging method for backup your drive or volume. Here, I am considering Mac operating system so, all are basically concerned with Mac users.

I will include the need of backup, process of disk imaging with its pros and cons etc. We know that our life has become entirely digital and started storing a lot of stuff on our computers or hard drives. Computers have become an important part of our life. For example we store lot of our family snaps from iPhoto app and usually rely on iMovie to edit our treasured family videos. Our Mac machine store dozens of passwords and login items in it and it also takes care of thousands of documents and files that we create.

But, in online marketing or International business or anyone who uses a Mac in business, the scene becomes even more critical. Because, here, our entire livelihood depends on our digital data or files that are in hard drive of our machine. So, without a reliable backup plan it is possible to lose your work and thousands of dollars of revenue in just a moment of hard drive crash or failure. So, we should not only require to keep backup of our data at one place instead at various locations like network drives etc.

So, now, it is obvious, that it is essential to have a reliable backup plan for anyone who uses a computer in business.

We heard many such data loss incidents in multinational companies that caused big loss to them, That is reason why backup has become an important practice for both businesses and home users. As it is impossible to avoid data loss situations due to drive failure, human error, corruption etc.
Backup is the most excellent and reliable solution to protect your data from loss. Backup can be of many types: like Local backups, online & offline etc.

First you need to understand the general definition of backup. Backup means copy of your data or drive. While cloning is a backup method that gives you bootable clone by making exact replica of your drive. Another method of backup is imaging that I have describen in this article.

Imaging drive – What is it?
Imaging of drive creates exact copy and leaves the bad sectors (if any) of your drive. You can create image of your drive using disk utility of your Mac or some third party apps in order to have a complete backup of your machine in a single file. Image process is faster in comparison to clone.

Mac disk image is a .dmg file which contains complete contents, structure that represents a storage medium such as hard drive, CD/DVD or USB drive.

Significance of Disk imaging:
In case of drive failure and data loss, whether windows or Mac, you can easily restore your data from disk image.

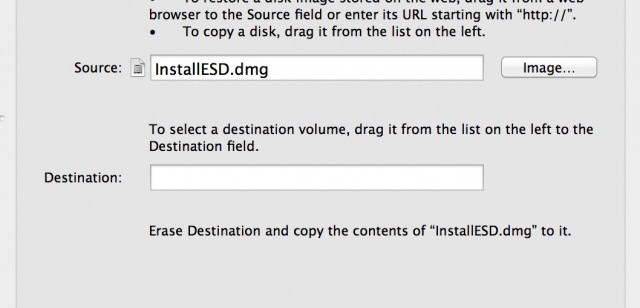
How to create Disk Image:

You can create image of your storage media using Disk utility or other suitable third party applications. There are numerous disk imaging sofware available in market having different capabilities. For Mac users also many hard drive imaging apps are there. However, some efficient disk imaging tools includes cloning features too.

Significance of Disk imaging:

Forensic Imaging: It is the process where whole storage disk are imaged to a single file and in order to verfying integrity of image the checksum values are calculated. These disk images can be created using some trusted software programs like Stellar Drive Clone for Mac.

Disk cloning: Disk cloning is used for replicating the contents of drive to use in any other machine. Not only data but it also replicates the structure of hard drive, programs and operating system. The disk cloning is possible through some specified applications.

Some effective Mac imaging software with interactive and simple graphical user interface, enables you to create image of your boot disk.


Restore Image of your entire machine :
Imaging gives a great value in terms of protecting your data against drive failure, because you have image of your Mac disk on some external drive. By restoring this image backup you can bring machine to working state in few minutes.


Image backup gives bootable applications:

Another advantage of image-based backups are that it gives installed applications in your destination drive/machine. If you are an experienced system user, you must be knowing that simply copying the program files or applications from one system to another will not work. A drive image includes all contents and restoration of image of your disk ensures proper functioning of applications.

Advanced Usage of Image disk Backup:

Disk imaging lies in the principle of hard drive cloning. By creating an image backup of one hard drive and restoring it to some other storage device, you will receive a exact carbon copy of that drive.
One can also use imaging when he need to set up multiple identical computers for some purpose or business.
If you love to help others with computers, then it will be of great usefulness for you.

Disadvantages of Image Backup

A disk image can not distinguish a file system. So, its not possible to differentiate between the sectors on the basisi of their importance. Therefore, one has to devote complete time and expense , everytime he creates an image backup.

I have found Stellar Drive Clone as an efficient Mac cloning and imaging software for Mac OS X. It is easy to use application, fast and reliable. It allows you to clone and image your Mac drive, volume to another drive/volume, folder or network.

For more details of this cloning and imaging app of Mac, ona can visit the below link:-

Friday 14 June 2013

Overview of Cloning Hard Drive on Mac


Do you know what cloning means in Mac world? If not, then you should read this post in order to be acquainted with this concept. You might have been creating backup copies of all essential files of yours and saving them to some external storage media (such as a hard drive). However, you cannot even use this backup if your Mac is crashed. Can you restore your data from backup in such a situation? No, you cannot, until you reinstall the Mac. Well, cloning is the technology that can resolve this issue just like that.

What is Cloning

Cloning in Mac world is the best alternative to data backup techniques, which creates bootable backup of your Mac’s hard drive including data. In fact, cloning is the process of creating a replica of Mac’s hard drive, from which you can even boot.

Why to Clone

Since cloning process replicates the source drive on destination drive, following are the advantageous features of Mac drive clone:
  • Cloning facilitates using both drives alternatively, as these drives are spitting images of each other.
  • Clone drive is the bootable backup of the source drive.
  • Data remains secure in case either of the hard drives is crashed.
  • One can create more clones from the clone drive also.
Though both drives have similar properties and characteristics, they are completely independent of each other. Moreover, one can use clone drive as the portable hard drive.

Things to remember 

As discussed above that drive cloning process creates a bootable replica of the source drive, there are two prime necessities (i.e. a hard drive and the cloning tool) to create Mac drive clone, which must be fulfilled without failure.
  1. The capacity of the destination drive (whether internal or external) must be equal to or higher than that of the source drive (i.e. drive to clone).
  2. Destination drive should have equal number of volumes as on the source drive having similar file format (Mac OS Extended (Journaled)) and Partition Map Scheme (GUID Partition Table).
Case 1: Using an internal drive
If you are going to use an internal drive as the destination drive (i.e. to clone on), then you need to install it first. Make sure the cables you are going to connect to it are correct and check all screws properly.
Case 2: Using an external drive
In case of the external drive, you need the USB data cable to connect it to your Mac. Once you connect it to the Mac machine, please ensure that it is visible in the Disk Utility.

Cloning Process

When all requirements are fulfilled and you have gone through the key points, you can start cloning your Mac in easy steps. However, you need to format the destination hard drive using following steps:
(Boot your Mac OS X Lion or Mountain Lion in Recovery Mode, else use OS X install disc for earlier versions.)
  1. Launch Disk Utility.
  2. Select the destination hard drive shown on the left, and
  3. Go to the Erase tab at the right.
  4. In the Format dropdown list, select Mac OS Extended (Journaled) and type a Name for this drive
  5. Click Erase button, and again click Erase button in the pop-up warning
  6. Wait until the drive is formatted
Once the drive is formatted, you can start cloning on it using following steps:
  1. Select the source drive at the left and go to the Restore tab at the right.
  2. If source drive is not listed in the Source field, then drag it here from the left pane.
  3. Drag destination drive to the Destination field.
In some earlier versions of Mac, you need to click Erase Destination checkbox. In recent versions, destination drive is erased automatically.
  1. Click Restore button to begin.
If cloning finishes successfully, then you can boot from the clone drive as well. For this, press ALT key when Mac is booting and choose clone drive.

Monday 10 June 2013

Clone Mac hard drive or volume effectively using apps


Have you ever practised any strategy of backup in order to protect your precious data? How it sounds if you get assurity for the security of your entire Mac drive? 
Well, it is possible for home users and corporate via Drive cloning. We have seen or heard many cases of data loss causing a big harm to companies that effects their growth and reputation. Home users also face such situations of losing precious data in their day to day life. 

Because it is impossible to control or avoid situations like drive failure, so it is advisable to create clone of Mac drive. It is also important to understand that cloning prevents you to face the hardships of doing recovery of your lost data.

Fortunately, now a days people became aware of methods like drive cloning that keep them away from the losing precious data. As cloning ensures protection of your complete Mac drive.

There are many scenarios when cloning works as boom. One such scenario happened with me also that I am sharing with you.
One day I have experienced frequent lockups in many of my applications on iMac. I ran Disk Repair many times with Disk Utility and got the error, “The Volume Macintosh HD was found corrupt and needs to be repaired.” in every attempt.”

The above scenario shows the situation of your Mac suffering from application lockups. This problem demands to get repair immediately in order to maintain data security. Therefore, in order to repair Mac volume, you must try booting your Mac in Safe Mode using following easy and quick steps:

  • Restart your Mac machine.
  • Now, press and hold the Shift key immediately just after hearing the Mac startup tone.
    Please make sure you press the Shift key just after startup tone not before it only just at the right time.
     
  • Release the Shift key as you see the gray colored apple icon and a spinning gear indicating progress.
  • When it boots up to desktop, go for normal restart, and then check if the issue persists. 
     
Booting in safe mode tests your drive and shut down all unnecessary applications of your Mac OS X. It forces a directory check of startup volume. As it loads only required kernal extentions, but it lets you access Mac data in most situations (like crash,freeze) in order to find the cause of problem by troubleshooting. However, safe boot won't resolve your issue but help you to identify problems. So, in order to resolve problem first clone your drive and re-install Mac OS X.

The best way to protect your precious data and to avoid data loss situations is to clone entire Mac disk to an external drive. By getting a good Mac cloning application you can clone either the boot volume or the entire Mac drive including data. Cloning replicates the selected source drive by copying its internal sectors and structure. Moreover, clone Mac drive not only ensures the security of your OS X, but even of the data because clone drive can be used in the place of original drive. If your Mac machine encounters any issue in booting or volume inaccessibility , or any other data loss issue, you can handle it using your clone drive until you get back your original drive from repair.

So, it is important to create clone of your data in order to protect it from vulnerabilities(internal and external). Mac users ask why we need to back up data, as OS X is secure enough. While a few say yes fo backup, they use Time Machine for Mac data backup. Well, backing up data using Time Machine is great, as it facilitates taking incremental backup of every hour. Time machine also keeps a sharp eye on each alteration or modification you make in files or documents and update backup by itself. Time Machine works with Mac drive, external drive (USB hard drive). But, its disadvantage is it cannot gives bootable backups. Another disadvantage is you might not access you backup data if your drive has been crashed or failed. 
 
So, inversely drive cloning is better and allows you to face such situations of Mac drive failure easily with better results. Cloning process refers to replicating the contents and logical structure of Mac drive to another destination drive so that clone drive can be replaced by original drive when it fails. 
 
Now, you might be thinking what are the formal requirements for Mac cloning , and how it is done.

Formal Requirements you need to Clone your Mac Drive:

As it is understood from the name itself, that cloning requires another drive. This drive is called destination drive where you save clone copy of your Mac disk. But, make sure that the target drive(destination drive) is at least equal or greater in storage capacity as compared to the Mac drive(source drive).
To clone your Mac drive, you can opt for an efficient and reliable software to give results in desired manner. Here, we will discuss both Disk Utility and an reliable third party cloning tool.

Drive Cloning with Disk Utility

Mac OS X has Disk Utility as an inbuilt disk management application having capability of cloning drive. After attaching external drive to your Mac, launch Disk Utility and select the destination drive from the left hand pane. Now, make sure the drive is not partitioned and go to the Partition tab then specify it a name, select ‘Mac OS Extended (Journaled)’ format in the drop-down list. Click 'option' button and choose GUID Partition or Apple Partition Map (on Intel-based Mac and on PowerPC-based Mac) to make this partition boot enabled. Click on Apply to save these modifications.
Now, click 'Restore tab' and drag source drive to Source filed and modified drive to Destination field of disk utility. Finally, click Restore button to start cloning.

Drive Cloning with Third party application:

You can find a lot Mac drive cloning software; however, it is important to select a good and authorized cloning application without causing any risk of harm. So, according to reviews I found Stellar Drive Clone as a reliable Mac cloning application. It is easy to use with an interactive interface. It creates bootable clone, and supports SSD. The most interesting thing is that software also has facility to create image of your Mac disk. It can clone your drive/volume including recovery HD.

Thursday 6 June 2013

How to create image of Mac disk/volume using Disk utility

Mac machine are the best and most demanding machines especially from business perspective. Although these machines are expensive and more advance but one cannot avoid situation of hard drive failure or crash.

So, what one can do is to have proper back up of their precious documents instead of blaming technology or failed drive. Situations like improper shutdown, power failure resulting in data loss. There are two methods of backup data: Cloning and Imaging. 
 
Clone is an exact copy of your drive/volume that provides you bootable backup. While imaging is replica of drive including its contents, structure etc. Imaging is always beneficial in hard drive failure scenarios, as you can restore it when needed. Mac OS X has an inbuilt backup tool i.e. Time Machine. It can create incremental backups (if configured can also perform backup at hour-basis). 
 
However, imaging is less time consuming process as compared to cloning. Larger the size of your boot volume longer it will take to create image. But, time machine can't perform imaging of your Mac drive. So, to overcome it, Apple provides us Disk Utility in Mac as a free inbuilt tool with many features.
Using disk utility you can create image of your boot volume and can boot Mac using this image.

Creating image using disk utility application as folows:-

Imaging a Mac volume refers to the process of replicating the structure, contents of that volume. A file generates in imaging process with .dmg extension contains complete data of the selected volume.

Basically, imaging is nothing but a process of taking snapshots of the source volume/disk.

So, you can create image of any volume including your Mac boot volume. One can restore his image of boot volume in case of drive failure or crash. You can even boot multiple (similar architecture) Mac machines using this image (.dmg) file without having the need to reinstall or reformat OS X.

Now, one must know how to create image using disk utility. So, below are simple steps of imaging a Mac boot volume using Disk utility.

Steps to Create Image of Boot Volume in Mac using Disk Utility:

  • Attach an external hard drive to Mac having storage capacity atleast equal or larger and let it mount.
  • Launch Disk Utility or follow Go -­-­-­> Applications -­-­-­> Utility ‑­-­-> Disk Utility.
  • Select boot volume from left hand pane of disk utility.
  • Now, on ‘First Aid’ tab, click Verify Disk.
  • If it shows any error, click ‘Repair Disk’ to fix them.
  • Now, click 'New Image' option from the menu bar.
  • Now, either specify the destination location to save this image (.dmg) file in the left most pane of disk utility window or create a new folder at this location.
  • Click 'Save' to start the imaging process.
  • Click on ‘Images’ menu and then select ‘Scan Image for Restore’.
  • Exit Disk Utility and restart the Mac.

Practically, imaging technique comes in action for avoiding data loss situation due to drive failure,volume corruption, accidental deletion of data, inaccessibility etc. Apart from Disk Utility, there are various Mac imaging applications , those are capable for creating image of specific volumes along with the complete drive.  
There is a one famous Mac Cloning and Imaging application that I am using is Stellar Drive Clone. This software allows you to create image of boot volume in both Minimal Installation mode and with default or desired selected installed applications. Once this process is completed, one can burn this image to DVD in order to make a bootable alternative for his Mac.

Make sure to save this image at a secure location, like an external drive or a network drive. It is necessary to keep an updated image of your boot volume in order to revert to the latest running state of Mac.


Steps to Restore Mac with Image:

You can use your Mac boot volume image to restore Mac with Disk Utility or tool like Stellar Drive clone.Follow the steps discussed below:
  • Insert Mac OS X install disc and restart your Mac.
  • Press and hold C key in order to boot from Mac install disc.
  • Choose your preferred language.
  • Launch Disk Utility.
  • Go to ‘Restore tab' in right hand pane.
  • Select your external drive in the left hand pane, and then image file.
  • Now, drag image file to the ‘Source’ field.
  • Drag disk to restore image on ‘Destination’ field.
  • Click Restore button, then click OK.

After the restore process finished, eject OS X install disc. Now, you can boot normally.